
Find the Right Skate Fit Without Guessing From Shoe Size
Start with both-foot measurements, use the current chart for the exact player skate, assess width and volume, then verify toe position and heel lock.
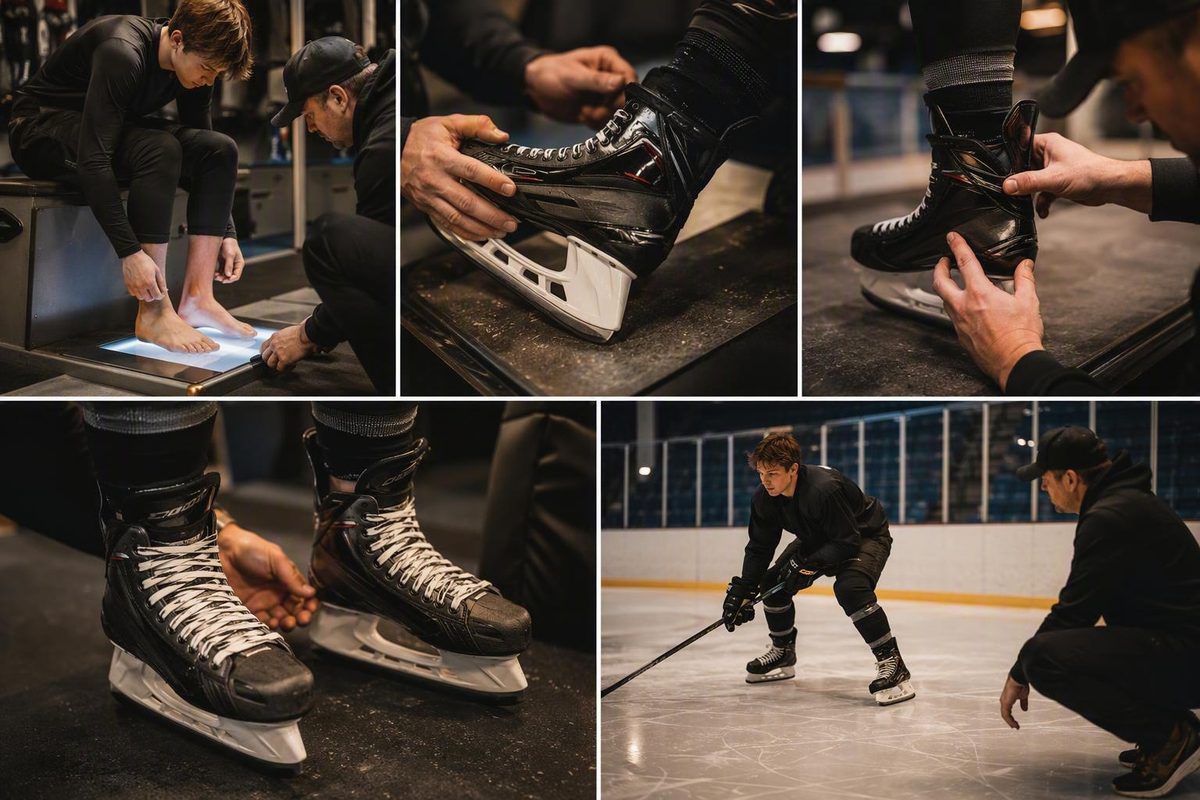
Updated September 7, 2026. Manufacturer sizing pages and market-specific guidance were checked on this date. This guide distinguishes manufacturer chart data from general retailer fitting advice.
Information notice: This hockey skate size guide provides general sizing information for player skates, not an individualized fitting or medical assessment. If pain, numbness, circulation changes, or unresolved pressure persists, stop the fitting process and consult a qualified skate fitter or healthcare professional as appropriate. See the site’s Terms & Conditions.
The quick answer: how hockey skate sizing works
The best hockey skate size does not come from one subtraction rule. Use this four-step hierarchy:
- Measure both feet in centimeters or millimeters.
- Consult the current chart for the exact skate you are considering.
- Choose a plausible width and volume profile rather than treating length as the only variable.
- Verify the fit on both feet, first while standing upright and then with your knees bent in a skating stance.
For adult player skates, a common starting estimate is about 1 to 1.5 US sizes below a men’s street-shoe size, but this is not a universal conversion (Pure Hockey).
For example, a men’s US size 8 shoe commonly points to a senior size 6.5 hockey skate (Ice Warehouse). That example is useful for deciding which box to try first—not which pair to buy. Measured foot length, the applicable chart, and the on-foot fit should determine the final choice.
Quick reference
- Measure first.
- Use street-shoe size only to identify nearby options.
- If the result is uncertain, compare adjacent half sizes.
- Check length, forefoot width, heel shape, instep height, and overall volume.
- Do not assume the same numerical size fits identically across brands—or across different models and generations from one brand.
- Confirm the fit before modifying or using the skates.
This guide concerns player skates. It does not establish that the same sizing rules apply to goalie skates.
How to measure both feet at home
A careful home measurement gives you a better starting point than a remembered sneaker size. Use the thin socks you genuinely intend to wear in the skates.
What you need
- The thin socks you intend to wear while skating
- Two sheets of paper
- A pen or pencil
- A ruler or measuring tape
- A hard, level floor
Tracing method
- Put on your intended skate socks.
- Place one sheet of paper on a hard, level surface.
- Put one foot fully on the paper and stand with your weight on it.
- Trace around the foot while keeping the pen or pencil perpendicular to the floor.
- Mark the rearmost point of the heel and the end of the longest toe.
- Measure between those points in centimeters or millimeters.
- Measure across the widest part of the forefoot.
- Repeat the entire process for the other foot.
Standing measures the foot while it is under load. Ice Warehouse’s tracing method likewise calls for standing in skate socks, keeping the pencil perpendicular, and recording length and forefoot width in centimeters.
Use the longer foot as the initial basis for skate length. Keep both width measurements, however, because feet can differ in more than one dimension. During the eventual try-on, assess each foot independently rather than assuming that a successful fit on one side proves the pair fits.
Wall method for foot length
If tracing is awkward, stand with the heel gently against a wall and measure from the wall to the end of the longest toe. Do not force the heel backward or curl the toes. Repeat with the other foot.
The result may be described as a Mondopoint measurement. Mondopoint is foot length expressed in millimeters or centimeters. It does not mean every manufacturer assigns the same skate size to that length; a product-appropriate chart still has to translate the measurement into a box size.
Measurement worksheet
| Measurement | Result |
|---|---|
| Left foot length | _ cm / ___ mm |
| Right foot length | _ cm / ___ mm |
| Left forefoot width | _ cm / ___ mm |
| Right forefoot width | _ cm / ___ mm |
| Longer-foot measurement | _ cm / ___ mm |
| Socks used for measurement | ______ |
| Brand being checked | ______ |
| Exact model and generation | ______ |
| Regional chart or market | ______ |
| Likely size | ______ |
| Adjacent half size to compare | ______ |
Record the raw measurements rather than only the calculated skate size. That lets you revisit the decision when comparing another model.
If your measurement lies between two chart entries, do not automatically round up or down. Compare the adjacent half sizes and let toe position, heel lock, width, and instep pressure determine which fits better.
Convert your measurement without creating a universal size chart
There are two different forms of conversion:
- Direct foot-length sizing: Match measured length to the applicable manufacturer chart.
- Approximate shoe-size conversion: Use a street-shoe size to identify a small range of skates to try.
Direct measurement should take priority. Shoe sizing differs among footwear makers and systems, while hockey-skate lasts can differ by brand, model, and generation.
Bauer player-skate foot-length reference
The following is a Bauer-specific player-skate reference, not a universal hockey skate chart. The Bauer player-skate chart, verified September 7, 2026, publishes these ranges:
| Bauer category | Bauer player-skate sizes | Bauer foot-length range |
|---|---|---|
| Youth | 6–13.5 | 14.5–20.7 cm |
| Junior | 1–3.5 | 21.0–23.1 cm |
| Intermediate | 4–6.5 | 23.5–25.5 cm |
| Senior | 7–15 | 26.0–32.6 cm |
Selected Bauer-specific examples make the lookup more concrete:
| Measured foot length | Bauer player-skate size |
|---|---|
| 24.3 cm | 5 |
| 26.8 cm | 8 |
| 28.5 cm | 10 |
| 31.0 cm | 13 |
These ranges and examples come from Bauer’s player-skate size guide. Before ordering, confirm that the chart available in your market remains applicable to the skate you are buying.
Pure Hockey’s third-party Bauer conversions disagree with Bauer’s manufacturer chart at some entries, including certain larger intermediate and senior sizes. For a Bauer product, the applicable Bauer chart should take precedence over a general retailer conversion. A disagreement is also a reason to compare adjacent half sizes rather than treating either chart as a substitute for an on-foot test.
Why there is no universal CCM table here
The SkatePro CCM table in the available evidence applies only to the CCM Jetspeed FT475 Junior and CCM Next skates. Publishing it as a universal CCM table would create false precision.
CCM recommends using its current size guide or digital scanner and then checking the resulting fit. The manufacturer also calls for measured feet, a snug but pain-free fit, some toe space, and a firmly held heel in its skate-sizing guidance. Use the CCM information available for the product and regional market rather than importing Bauer’s centimeter values.
Women’s shoe-size conversion
For a US women’s shoe size, subtracting about three sizes can identify a rough starting skate size. A women’s size 9, for example, commonly suggests approximately a size 6 skate (Scheels). This is only a shortcut for choosing nearby boxes to try, not a rule every woman should follow.
Measure both feet in centimeters and use the applicable manufacturer chart. This is especially important because Bauer’s published table does not provide women’s equivalents for every player-skate size.
Youth, junior, intermediate, and senior are size categories
Treat youth, junior, intermediate, and senior primarily as numerical product categories—not diagnoses based on age. Published age ranges overlap, manufacturers and retailers can place category boundaries differently, and a child’s measured foot can cross a boundary earlier or later than an age estimate suggests.
For international shoppers, US men’s, US women’s, UK, EU, and Mondopoint values are not interchangeable. Use the conversion published by the manufacturer for the relevant market. Mondopoint describes measured foot length; the other labels are footwear size systems whose correspondence can vary.
How a correctly sized skate should feel
A new player skate should feel close and snug, with much less unused space than a casual shoe. Snug does not mean painful. Pain, numbness, curled toes, restricted circulation, or persistent compression indicate a fit problem rather than a target sensation (Pure Hockey).
Begin the evaluation only after seating the heel and lacing the skate evenly.
Upright toe test
Stand upright with your weight balanced normally. Your toes may lightly brush or barely touch the toe cap. They should not be folded, jammed, or forced to curl. Clearly unused room ahead of the toes can indicate excessive length, although heel shape and lacing also require assessment.
Bent-knee skating-stance test
Bend your knees, bring the shins forward, and settle into a realistic skating posture. As the heel remains seated, the toes should pull slightly away from the front. A skate that feels close while upright can therefore have appropriate length once the ankle and knee move into skating position.
The Puck Stop fitting test makes the same distinction: the toes brush the front while standing but move away in a skating stance, while the heel remains seated.
Heel-lock test
Walk indoors only if the retailer permits it, then flex the knees several times. The heel should stay firmly in the heel pocket with little or no obvious lifting.
Heel lift does not always mean the skate simply needs to be shorter. It can result from:
- Excessive boot length
- Too much volume around the heel
- A heel pocket that does not match the wearer’s shape
- Uneven or insufficient lacing
Do not use a universal millimeter threshold for acceptable heel movement; the available guidance does not establish one. Look instead for obvious slipping, vertical lift, or forward-back movement.
Pass/fail fit checklist
Assess the left and right feet separately.
| Fit check | Pass | Fail |
|---|---|---|
| Toe position upright | Light brushing or barely touching | Toes curl, jam, or sit far behind the cap |
| Toe position in skating stance | Toes pull slightly back | Toes remain compressed or excess space remains obvious |
| Heel security | Heel stays seated during flexion | Obvious lifting or sliding |
| Foot on footbed | Foot rests flat and stable | Foot feels tilted, folded, or displaced |
| Forefoot | Close, even contact | Side pinching, numbness, or persistent compression |
| Instep | Secure without concentrated pressure | Sharp top-of-foot pressure or lace-bite sensation |
| Circulation and sensation | Normal warmth and feeling | Numbness, tingling, or restricted feeling |
| Unused space | Minimal | Noticeable empty space around toes, heel, or sides |
A single failure does not always identify the remedy. Heel movement, for example, might call for a shorter length, a different heel shape, or a lower-volume profile. Diagnose the dimension before changing the box size.
Choose width and volume separately from length
“Size” is not one measurement. A useful fit assessment separates at least five dimensions:
- Boot length
- Forefoot width
- Heel shape or depth
- Instep height
- Overall foot volume
Traditional width letters
Traditional labels provide broad guidance:
| Label | Broad meaning |
|---|---|
| C | Narrow |
| D | Commonly standard |
| R | Wider than D |
| E | Wide or extra wide, depending on the guide |
| EE | Widest among these listed options |
These meanings are reflected in retailer width guidance, including SkatePro’s skate-width reference. The letters are not standardized physical dimensions across all brands, models, and product generations. They also describe width imperfectly: a wider forefoot does not necessarily mean a deeper heel or more instep space.
Bauer Fit 1, Fit 2, and Fit 3
A specialist retailer fitting guide describes Bauer’s three-profile progression broadly as:
- Fit 1: narrower or lower-volume starting profile
- Fit 2: medium starting profile
- Fit 3: wider or higher-volume starting profile
These are directional categories, not precise measurements. The exact feel still depends on the model, size, foot anatomy, and how the boot wraps once laced.
CCM Tapered, Regular, and Wide
CCM describes its profiles as:
- Tapered: narrowest and lowest volume
- Regular: medium
- Wide: widest and highest volume
These are CCM’s general profile directions, not a promise that a Bauer and CCM label will fit identically. Bauer Fit 1 is not automatically equivalent to CCM Tapered, Fit 2 to Regular, or Fit 3 to Wide.
Optional length-to-width screening ratio
A retailer-derived screening calculation can suggest which profile to try first:
Foot length ÷ forefoot width = screening ratio
| Ratio | Provisional starting profile |
|---|---|
| Below 2.5 | Wider or higher volume |
| 2.5–3.0 | Medium volume |
| Above 3.0 | Narrower or lower volume |
For example:
26 cm ÷ 10 cm = 2.6
That result suggests a medium-volume starting point. Ice Warehouse uses these same ratio bands as an initial profile screen.
The ratio cannot measure heel depth, instep height, arch shape, ankle geometry, or the way the boot wraps the foot. Treat it as a way to narrow the options, not a fit guarantee—especially near 2.5 or 3.0.
If length and toe position seem correct but you feel concentrated pressure across the top of the foot, consider instep volume before increasing length.
Sizing skates for women and growing children
Women and children should not be forced through an adult men’s conversion as though it were a complete fitting system.
Decision path for women
- Use the women’s-shoe shortcut only to identify nearby skate sizes.
- Measure both feet in centimeters or millimeters.
- Use the longer foot with the manufacturer’s current chart.
- Check whether the chart provides a women’s conversion for that size.
- Compare adjacent half sizes when the measurement lies between entries.
- Test toe contact, heel lock, forefoot width, and instep volume on both feet.
Subtracting roughly three US sizes gives a convenient starting point—such as women’s 9 to approximately skate 6—but feet with the same street-shoe label can differ substantially. Bauer also omits women’s equivalents from some rows of its player-skate chart, making measured foot length more dependable than filling those gaps by assumption.
Decision path for children
Start with the child’s measured foot length and numerical skate size, not an age label. Youth, junior, intermediate, and senior ranges overlap in approximate age guidance, while actual selection depends on foot size and available products.
Approximately half a skate size of growth allowance is reasonable as conservative general guidance, but it is not universal. Published advice also expresses room as a finger gap, one-quarter inch, and other distances. These have not been established as exact equivalents, so do not combine or interchange them.
Substantially oversized skates can let the foot slide and reduce heel and ankle security, while outgrown skates can compress the toes and cause persistent pressure or discomfort. The goal is limited usable room—not a pair intended to accommodate several growth spurts.
Parent fitting checklist
- Measure both feet regularly; the previous skate size is not a current measurement.
- Use the thin socks the child will wear.
- Start length selection from the longer foot.
- Fully loosen the boot before inserting the foot.
- Seat the heel and lace the skate evenly.
- Check toe position upright and with knees bent.
- Watch for heel lift and forward-back sliding.
- Ask specifically about toe, side, and top-of-foot pressure.
- Compare the current candidate with the next half size.
- Choose the smallest option that provides a close, pain-free fit plus limited growth allowance.
Do not assume, for example, that every 10-year-old belongs in a junior or intermediate skate. Use the numerical size and measured length.
Diagnose common fit problems before changing size
Fit symptoms point toward likely dimensions, but they do not provide a guaranteed diagnosis. Lacing, sock thickness, heel seating, and individual anatomy can alter what the wearer feels.
| Symptom | Likely starting point to investigate | What to compare |
|---|---|---|
| Obvious heel lift | Excessive length or heel volume | Adjacent smaller half size; lower-volume heel profile |
| Forward-back sliding | Excessive length or overall volume | Shorter size; lower-volume profile |
| Excess empty toe space | Excessive length | Adjacent smaller half size |
| Curled or compressed toes | Insufficient length | Adjacent larger half size |
| Toes persistently jammed in skating stance | Insufficient length or poor heel seating | Larger size; reseat heel and retest |
| Forefoot pinching with acceptable toe position | Insufficient forefoot width | Wider profile in similar length |
| Side compression or numb forefoot | Insufficient width or unsuitable shape | Wider or differently shaped model |
| Concentrated top-of-foot pressure | Insufficient instep volume | Higher-volume profile |
| Lace-bite sensation | Possible instep-volume mismatch | Different profile; qualified fitting review |
| Side-to-side movement | Excessive width or volume | Narrower or lower-volume profile; check lacing and heel shape |
| One heel moves but the other does not | Unequal feet or heel shapes | Secure shorter foot without undersizing longer foot |
If your feet are unequal, begin length selection with the longer foot. Then determine whether the shorter foot can be secured without compressing the larger one. Do not undersize the longer foot merely to stop movement on the shorter side.
When toe length is close but the heel, forefoot, or instep is wrong, compare another profile or model in the same length as well as adjacent half sizes.
Heat molding can help a correctly selected boot conform more closely and may shorten break-in. The available evidence does not establish that molding can rescue excessive length or a major forefoot, heel, or instep mismatch. Scheels’ fitting guidance presents heat molding as a conforming step while still beginning with selection of an appropriate size.
Stop the fit test and seek qualified fitting advice; consult a healthcare professional when symptoms warrant it.
A return-safe process for buying skates online
Online buying can work if you separate selection from modification.
Before ordering
- Record both foot lengths in centimeters or millimeters.
- Record both forefoot widths.
- Identify the exact manufacturer, model, generation, and regional market.
- Open the current chart associated with the product.
- Select the likely size and, when practical, an adjacent half size.
- Confirm which width or fit profiles are offered in that size.
- Read the seller’s return and exchange conditions.
- Check whether indoor walking, lace marks, or inserted accessories affect eligibility.
- Confirm who pays return shipping if ordering two sizes.
Indoor fitting sequence
- Use the intended thin socks.
- Leave the supplied footbeds in place.
- Loosen the skate fully before inserting the foot.
- Tap or press the heel back gently to seat it.
- Lace the boot evenly; do not use extreme tension to conceal excess volume.
- Stand upright and check for light toe contact.
- Bend the knees into a skating stance and check whether the toes retreat slightly.
- Flex repeatedly and assess heel lock.
- Walk only on a protected indoor surface if the retailer allows it.
- Check forefoot and instep pressure after several minutes.
- Repeat every test on the other foot.
- Compare the adjacent half size or profile, if available.
Do not bake, heat, sharpen, or skate in the product until you are satisfied with the fit and have confirmed the retailer’s return terms. Ice Warehouse explicitly warns buyers to avoid those irreversible steps while a return or exchange may still be needed.
A manufacturer scanner or experienced fitter is particularly useful when:
- The feet differ materially in length or shape.
- The measurement falls between chart entries.
- No available profile holds the heel securely.
- Forefoot and instep symptoms point in different directions.
- A prior size no longer fits after a model or generation change.
- Pain, numbness, or concentrated pressure remains unexplained.
Final decision rule
Keep the skates only if all three conditions are met:
- The measured foot length agrees reasonably with the applicable chart.
- Both feet pass the upright-toe, bent-knee-toe, and heel-lock tests.
- The boots feel close and secure without pain, numbness, curled toes, persistent compression, or obvious unused space.
Recheck the chart whenever you change model, product generation, or regional market. A size that worked before is useful history, but it is not proof that the same number transfers unchanged.
Printable hockey skate fitting checklist
- [ ] Left foot length recorded
- [ ] Right foot length recorded
- [ ] Both forefoot widths recorded
- [ ] Longer foot identified
- [ ] Intended socks used
- [ ] Exact model and regional chart checked
- [ ] Likely size selected from measured length
- [ ] Adjacent half size compared where practical
- [ ] Width and volume chosen separately from length
- [ ] Heel seated before lacing
- [ ] Toes lightly brush the cap upright
- [ ] Toes pull back slightly with knees bent
- [ ] No obvious heel lift
- [ ] No side-to-side sliding
- [ ] No forefoot pinching
- [ ] No concentrated instep pressure
- [ ] No pain, numbness, or curled toes
- [ ] Both feet tested independently
- [ ] Return conditions confirmed
- [ ] No baking, heating, sharpening, or skating before the decision
Frequently asked questions
How many sizes smaller should hockey skates be than shoes?
Adult player skates commonly start about 1 to 1.5 US sizes below a men’s street shoe, but that is only an estimate (Hockey Plus). A men’s size 8 often suggests a size 6.5 skate. Junior and youth estimates may differ, and manufacturer, model, generation, and shoe system can change the conversion. Measure both feet and let the applicable manufacturer chart and on-foot tests determine the final size.
Should my toes touch the toe cap in hockey skates?
Light contact can be correct. With the heel seated and the skate laced, the toes may barely touch or brush the cap while you stand upright. When you bend your knees into a skating stance, they should pull slightly away while the heel remains locked. Curled, compressed, numb, or persistently jammed toes mean the fit has failed rather than merely feeling “performance snug.”
Which foot should determine my skate size if my feet are different?
Use the longer foot as the initial basis for skate length, then test both feet independently. The objective is to secure the shorter foot without undersizing and compressing the longer one. If the difference produces heel movement on one side or toe pressure on the other, compare profiles and consult an experienced fitter.
How much growing room should a child’s hockey skates have?
Approximately half a skate size can serve as conservative general guidance, but it is not a universal prescription (Scheels). Published fitting guides express growth room inconsistently, so a finger gap or inch-based allowance should not be assumed to equal half a size exactly. Compare the close-fitting size with the next half size and choose the smallest pain-free option that offers limited growth room without obvious sliding or loss of heel security.
Can heat molding fix hockey skates that are the wrong size?
Heat molding may help a properly selected boot conform to the foot and may make break-in easier. It should not be expected to correct excessive length or a major mismatch in forefoot width, heel shape, instep height, or overall volume. Confirm the unmodified fit and the retailer’s return policy before molding; if the basic stance and heel-lock tests fail, compare another size or profile instead.
The reliable process is measurement first: use shoe size only to identify a starting range, measure both feet, follow the current chart for the relevant player skate, and assess width and volume separately. Keep the pair only after confirming light toe contact upright, slight toe retreat in a skating stance, and secure heel lock.
If unequal feet, unresolved pressure, or conflicting measurements prevent a clear decision, use a qualified fitter or the manufacturer’s current scanner. Online buyers should preserve return eligibility by avoiding baking, heating, sharpening, or skating until the fit is settled.